My Breadboard Brings All The Boys to The Yard

When I’m bored on a Saturday, I sometimes like to go to Goodwill and buy a fork.

Just one.

Knives and spoons are also fair game, but forks are my favorite.

Often I’ll take a friend, if I have one handy, and she is the sort who does not immediately hang up when I ask for help buying a single used fork.

Everyone takes some persuading, at first, so I explain that it’s a really a game, with one goal: to pick the single best fork from among dozens or hundreds of random examples of the type. Having someone else along makes the game that much more interesting because, not only do you have to find the best one, you have to agree on it.

The point, besides having fun, is to practice appreciating the infinite variety that even the most mundane objects and experiences offer us. The thing itself costs maybe fifty cents, and if the hunting is good, can become a treasured prize and keepsake. Especially if you mud-wrestle for it afterwards.

My habit of staking out eBay for seemingly boring stuff — AA batteries, pull tabs, empty bottles — comes from a similar place. A solderless breadboard is ephemeral by nature, so most people never really stop to think about whether theirs could be better in any way. As long as it does the job without exploding or giving you anthrax, why waste time thinking about it? Honestly, I don’t have a good answer to that question. But the fact remains that I naturally tend to do so.

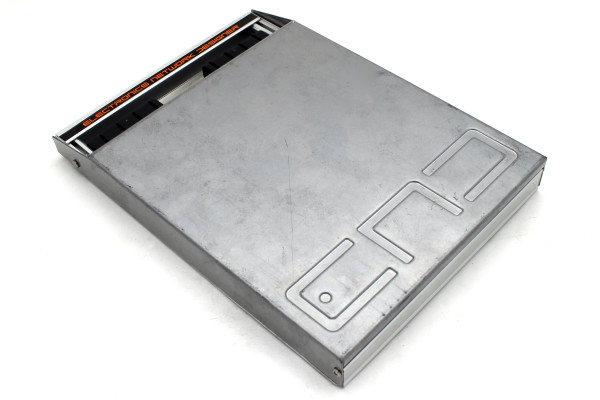
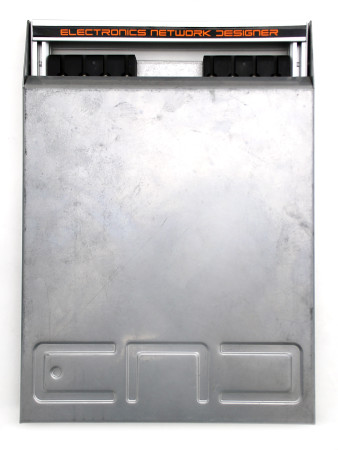
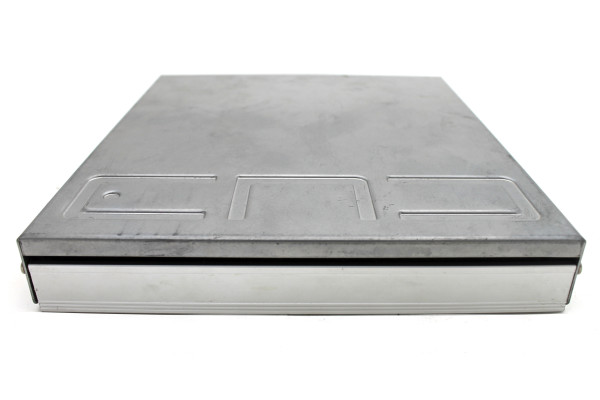
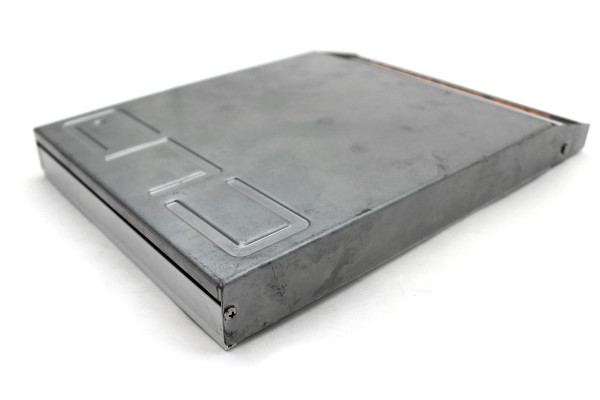
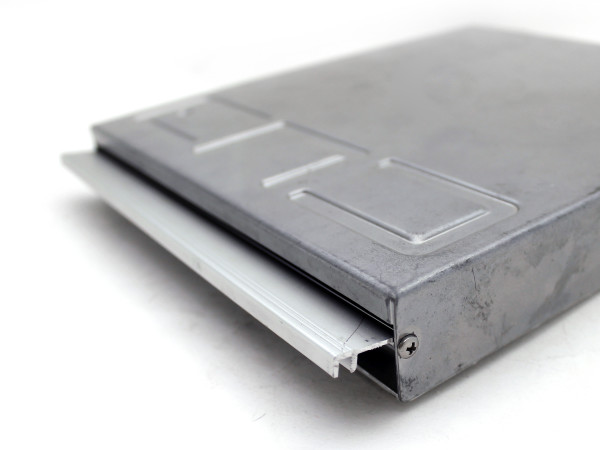
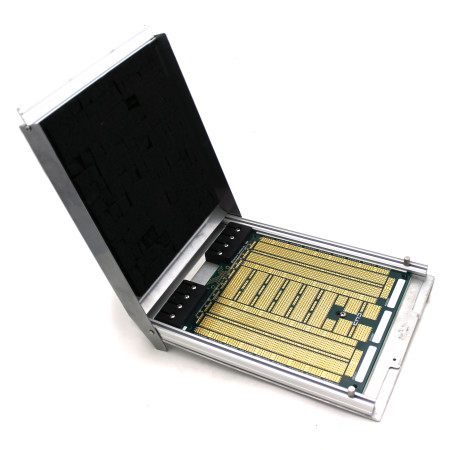
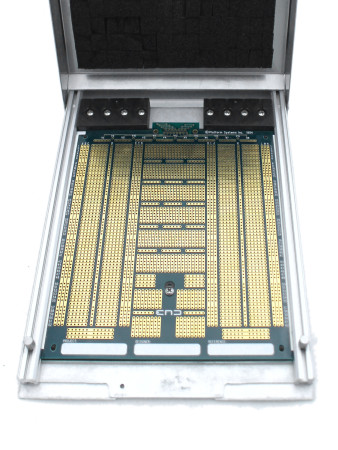
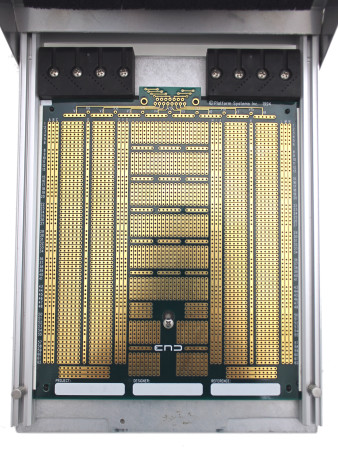
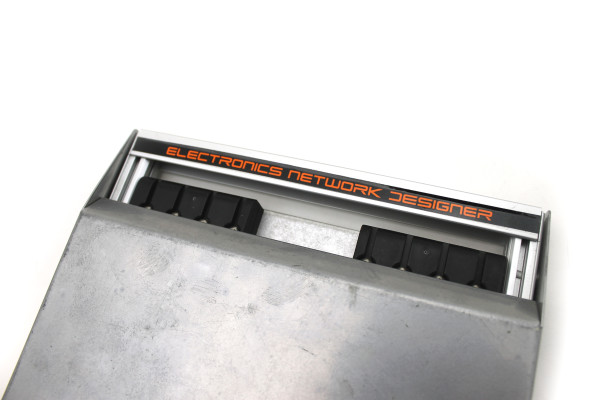
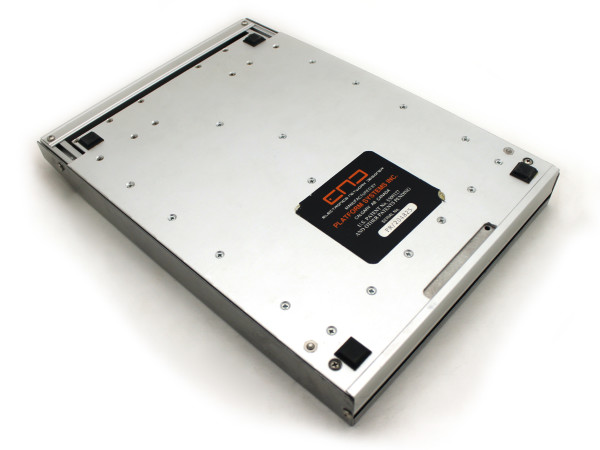
The object pictured here is the most amazing breadboard I have ever seen. I bought it simply because it turned up in one of my “boring” eBay searches and I doubted very strongly that I would ever see another like it. I paid twenty-five bucks plus shipping. I will let the photos speak for themselves.

Retrofitting a Classic Desk Fan With Leather Blades

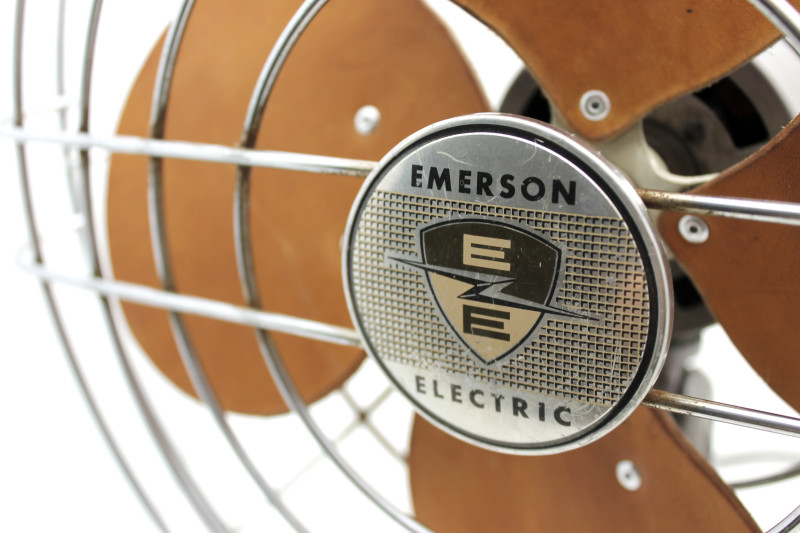
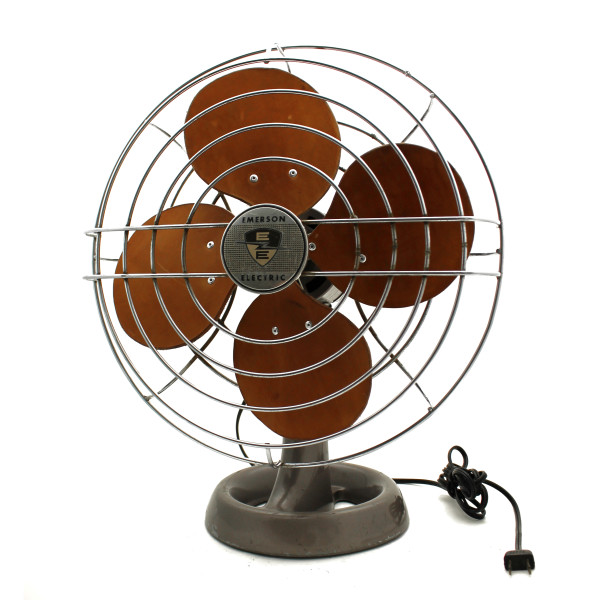
A close shot of the EMERSON ELECTRIC logo medallion on the front of a wire fan cage, with the replaced leather blades out of focus behind.

I’ve been on a “they don’t make ’em like they used to” kick lately, replacing a bunch of my new, flimsy, designed-for-disposal household appliances with old, battle-tested, designed-for-repair type stuff scored on eBay. Whether it’s the Cord-o-Matic retractable clothesline I snagged for my mom, the 1984-vintage Panasonic Auto-Stop electric pencil sharpener I bought for myself, or the cast aluminum Porter-Cable Model 136 I bought to replace my dad’s cheap Harbor Freight belt sander (which literally ground itself apart), I almost inevitably find that buying a used product with a proven track record gives a better overall experience than a new product that, as a friend on Facebook recently put it, “has had all the cost taken out.” Older stuff is usually easier to open up, refurbish, and repair, too, and it always has better stories.

So when my cheap plastic box fan recently self-destructed, I “retrograded” to this lovely chunk of metal—a model 94646-E “Northwind” oscillating electric fan by Emerson Electric, which appears to date from around 1955. You can see that it’s pretty beat-up, which is fine; I wasn’t looking for a carefully-preserved collector’s item, just something that worked and would be easy and fun to refurbish. I paid $45 plus shipping through eBay.
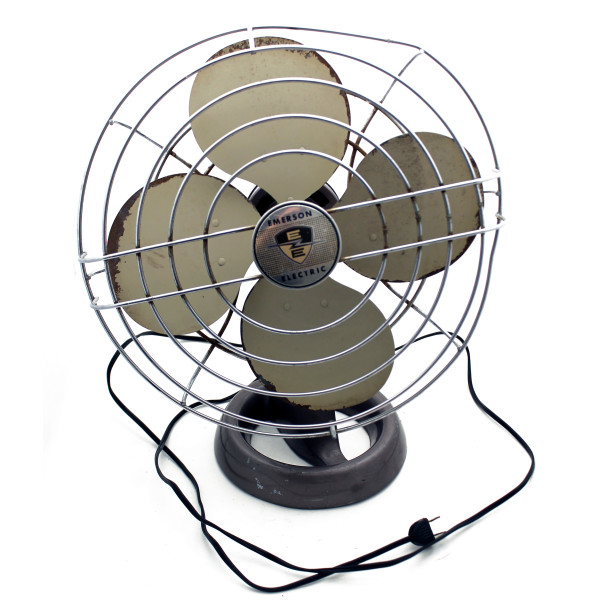
A front view of an all-metal oscillating desk fan with a wire cage. The cage is bent out of shape and the blades show some rust around the edges.

When the package arrived a couple weeks later, I cut it open and looked the fan over. There was some cosmetic damage—the cage was bent out of shape and the paint was peeling here and there—but when I plugged the thing in, it ran like a cheetah. The range of the oscillating motion was weirdly offset to one side, but it didn’t take long to figure out that somebody had reassembled it with the motor hub backwards on the base, and that flipping it around would center everything up again. Piece of cake.

Ten Minutes Later…

…I had cut myself, on the spinning blades, so badly that I thought I might need stitches. If I’d had more presence of mind I would’ve snapped a picture of the injury, but it’s amazing how preoccupied you can get when your body suddenly has a new orifice, oozing blood in time to your rapidly-escalating heartbeat. Once the cursing stopped and the bleeding was under control, I started laughing at myself. Apparently, in some cases, there are pretty good reasons why we don’t make ’em like we used to. When I told my mom, she smiled and said, “It’s amazing anyone from my generation grew to adulthood.” Which, I think, was her nice way of saying, When I was your age, we knew better than to stick our fingers into a spinning fan.

I wore an ugly mess of band-aids on the tip of my thumb for the next 10 days, and it was almost a month before the wound fully healed. I’m lucky things didn’t turn out any worse, since the fan had been stored who-knows-where, who-knows-how-long before coming to me, the edges of the blades were visibly rusty, and it had been waaaaaaay too long since my last tetanus shot.

What now?

So I sat, nursing my aching thumb, and wondering what to do with the fan. Would I remember cutting myself on the blade? Definitely. Was it nonetheless possible that I would eventually do it again? Also definitely. Given that it had taken less than ten minutes the first time, I gave it about even odds. Besides which, I was not the only one who might be exposed to this hazard. There was my girlfriend to think about. My nieces and nephews. My cat.

I had seen recently-manufactured fans with blades made of semi-rigid foam, silicone, or other soft polymer intended for safe use around a child, but I just couldn’t stomach slapping plastic blades on such a beautiful slab of post-war American industrial design. I’d sooner sell it to somebody else and go back to a modern appliance. But was there a more authentic, tasteful material that would also be softer and safer?

Of Course: Leather.
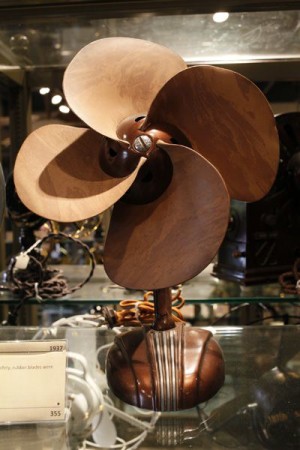
A desk fan, in front view, with no cage, and large free-spinning blades made of brown leather. The base is also brown and has attractive Art Deco styling elements.I had worked with vegetable-tanned belt and strap leather before, and knew I could buy it with weight and stiffness suitable for fan blades. What’s more, a bit of Googling revealed that this had been done before. To right, for instance, is a beautiful Art Deco-styled 1950 Robinson-Myer desk fan manufactured with leather blades, for safety, that was pictured in the July 2011 issue of Indianapolis magazine.

I started sourcing leather on the Tandy Leather Factory website, and though they taught me enough about how leather is cured, graded, and sized to figure out what I needed, they did not sell that material in quantities that were reasonable for this use. So it was back to eBay, which eventually lead me to Distant Drums, who sold me four pieces of their 10-11 oz. veg-tan tooling leather, each of which was just about the right size for a single blade. That set me back another $25, including shipping—the price of my “retrograde” was getting worse, but then the story was getting better, and that’s usually a trade I’m willing to make.

The Deets

First, you’ll wanna take off the blade assembly. In my case, this involved loosening a set screw that held the fan hub to the motor shaft, removing the two bolts that held the wire cage to the housing, separating the blades and the cage (together) from the rest of the fan, and then holding my mouth just right to rotate the blade assembly free of the cage. Second, you’ll need to remove the old blades. Mine were riveted to the hub, and were easily removed by drilling, from the back side, with a 3/16″ diameter bit. Once you’ve got the blades free from the hub, proceed as follows:
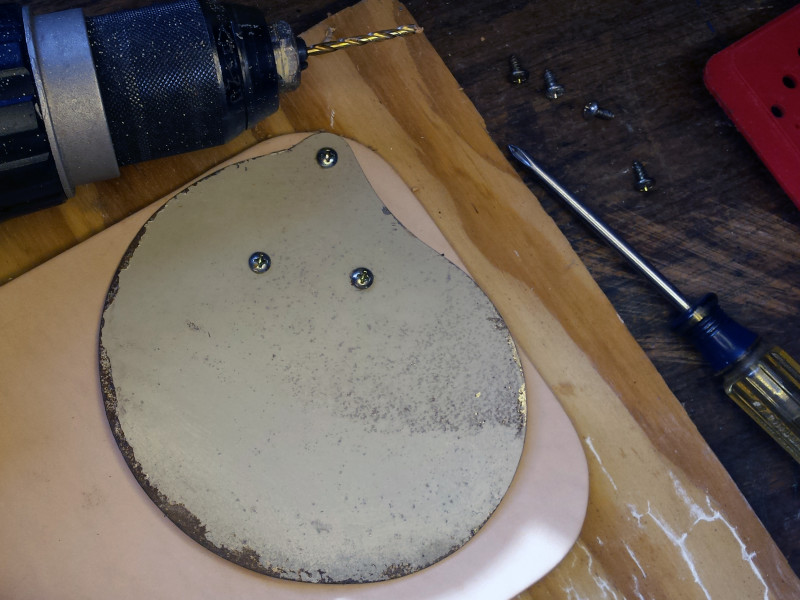
1. Put a piece of scrap wood down on your work surface, and then put your leather stock on top of that. Top the stack off with the template fan blade, then drill pilot holes through the blade mounting holes, through the leather, and into the wood. Secure the blade and leather to the wood with three small wood screws.
1. Put a piece of scrap wood down on your work surface, and then put your leather stock on top of that. Top the stack off with the template fan blade, then drill pilot holes through the blade mounting holes, through the leather, and into the wood. Secure the blade and leather to the wood with three small wood screws.

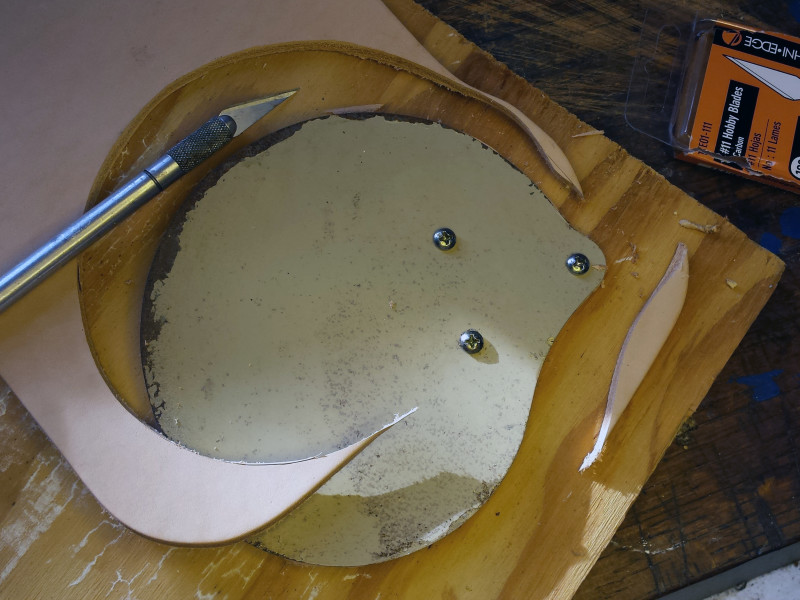
2. Trace around the perimeter of the fan blade with a sharp hobby knife, cutting through the leather as you go. It will likely take a couple of passes.
2. Trace around the perimeter of the fan blade with a sharp hobby knife, cutting through the leather as you go. It will likely take a couple of passes.

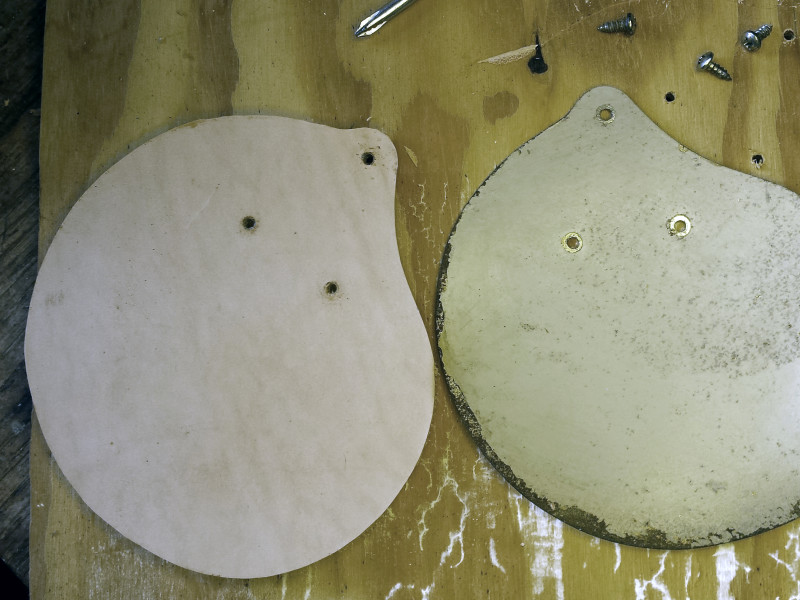
3. Remove the screws and separate the leather.
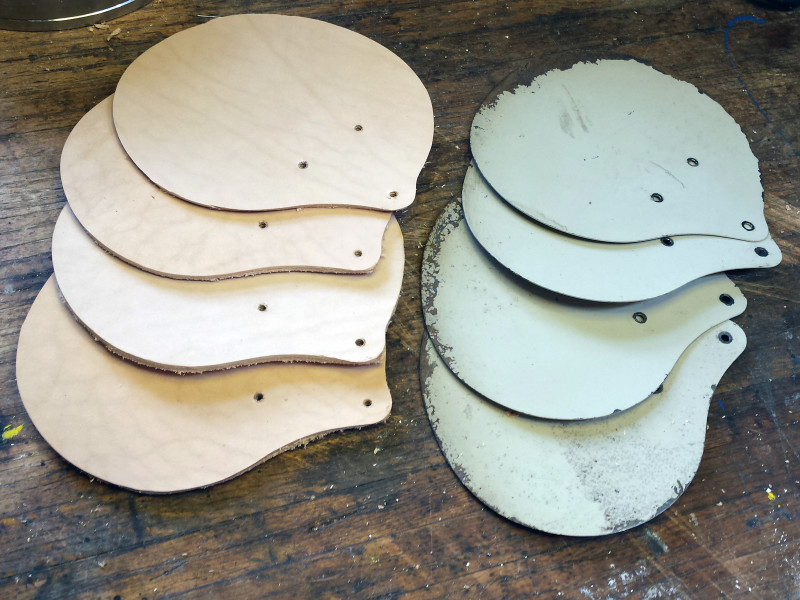
3. Remove the screws and separate the leather.

4. Repeat steps 1 - 3 three more times to cut four identical leather blades. NOTE: Be sure to identify two pairs of blades that are balanced to within 0.5g before proceeding (see below).
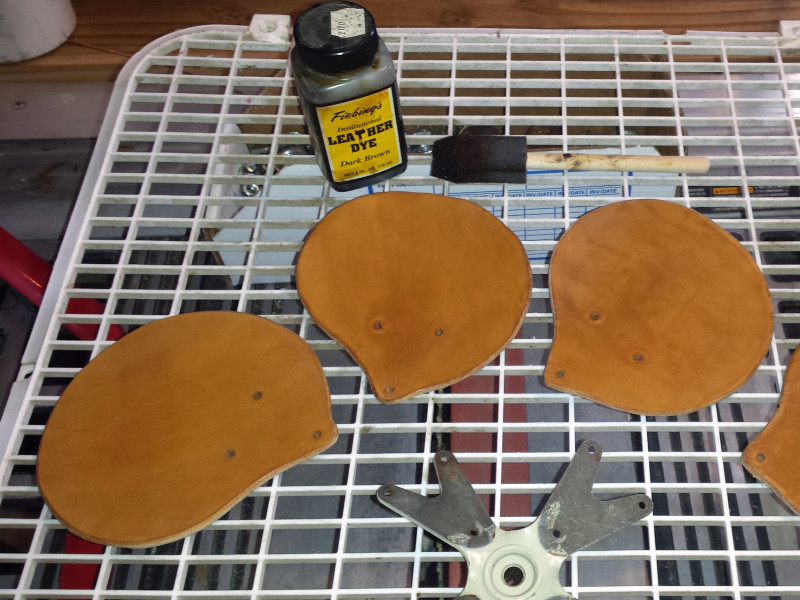
4. Repeat steps 1 – 3 three more times to cut four identical leather blades. NOTE: Be sure to identify two pairs of blades that are balanced to within 0.5g before proceeding (see below).

5. Apply leather dye to the front and back of the blades, per the dye directions, until the color pleases your eye. Let the dye dry thoroughly.
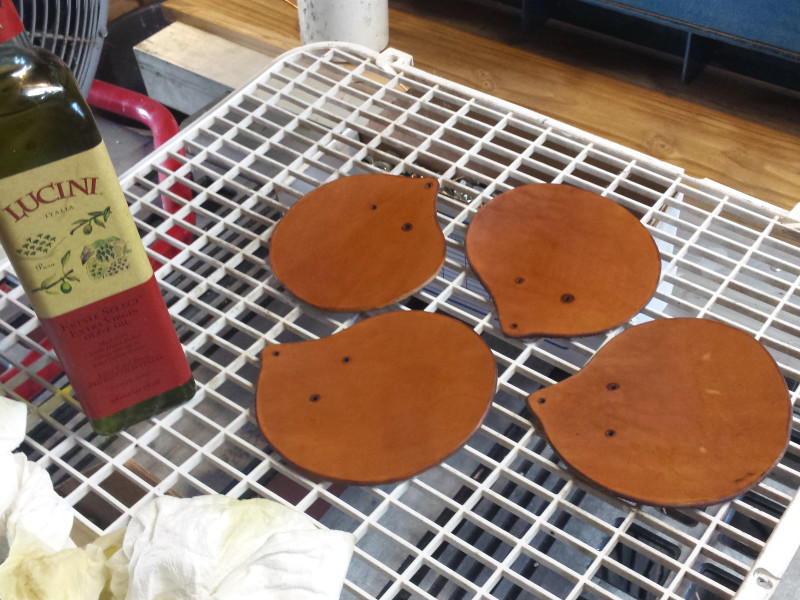
5. Apply leather dye to the front and back of the blades, per the dye directions, until the color pleases your eye. Let the dye dry thoroughly.

6. Rub extra virgin olive oil into the front and back of each blade to act as a finish and preservative. Allow excess oil to evaporate before proceeding.
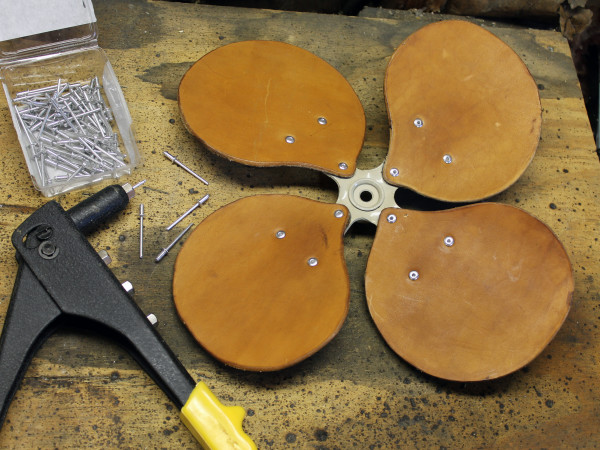
6. Rub extra virgin olive oil into the front and back of each blade to act as a finish and preservative. Allow excess oil to evaporate before proceeding.

7. Attach the finished blades to the hub using pop rivets and a pop rivet tool. To avoid tearout, the wide flange of the rivet should be against the leather, not the metal of the hub. Be sure opposing blades are weight-matched to within 0.5g before riveting.

7. Attach the finished blades to the hub using pop rivets and a pop rivet tool. To avoid tearout, the wide flange of the rivet should be against the leather, not the metal of the hub. Be sure opposing blades are weight-matched to within 0.5g before riveting.

Make Sure to Balance the Blades

My first assumption was that the leather was pretty homogeneous and that, if I cut four identical blades from it, they would each weigh about the same. Not true. The first time I put the hub and leather blades together, the fan wobbled horribly, and I had to drill out the pop rivets and break out my postage scale to weigh the blades, at which point I discovered that one of them weighed 46 grams, while the others all weighed about 40. I used a micro-plane kitchen grater to remove leather from the flesh side of the heavy blade, and then had to re-apply stain to replace the color I’d scraped off. If you try this project, learn from my mistake: weigh and balance the blades before applying any finish.
The refurbished fan, with handsome brown leather blades, touched-up paint, and straightened wire cage.

MSE-5: The Weekend Project That Wasn’t

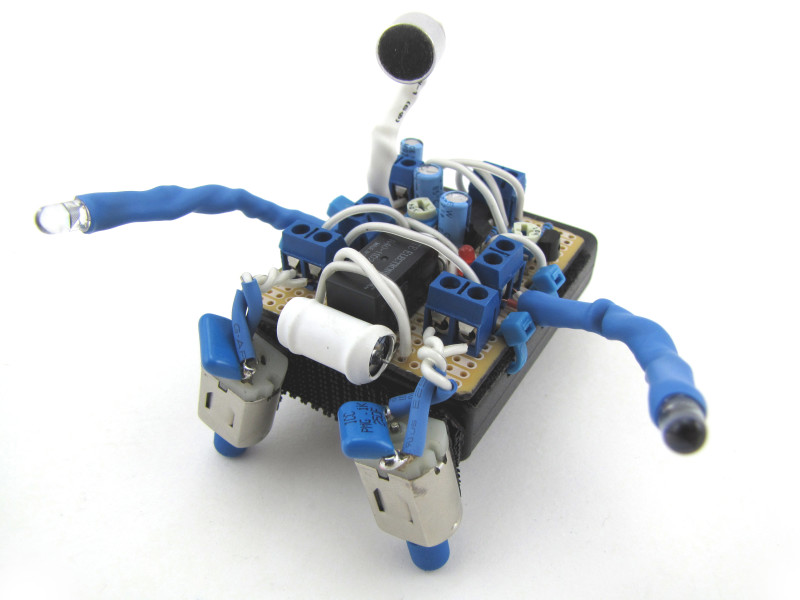
An elaborate but small hand-assembled BEAM style robot with carefullly coordinated colors in blue and white.

All parts are from RadioShack. Photo ca. August, 2012.

This is a Herbie-style BEAM photovore with a reversing relay. But instead of a bump switch, the “retreat” reflex is triggered by a sharp, loud sound like a clap. It was developed for MAKE’s RadioShack “Weekend Projects” campaign in the summer of 2012; the prompt specified a project that responded to both light and sound. “MSE” was intended to nod at “Mousey the Junkbot,” Gareth Branwyn’s famous Herbie-style build from “The Absolute Beginner’s Guide to Building Robots” (and MAKE Vol 06). MSE-5 was by most standards a failure, coming in three weeks past deadline and well over budget due to persistent line noise problems that would cause the reversing relay to trigger over and over again. I did eventually iron out the bugs, but the final build was much too complicated and never saw use. Still, the finished ‘bot turned out pretty sharp-looking, and I learned a heckuva lot about electronics in a very short time.

Though I can’t necessarily recommend that anyone should build it as-written, a complete PDF of the unpublished Make: Projects MSE-5 tutorial is available at the link below.

MSE-5: A Light- and Sound-Sensing Robot

OCD Bristlebot

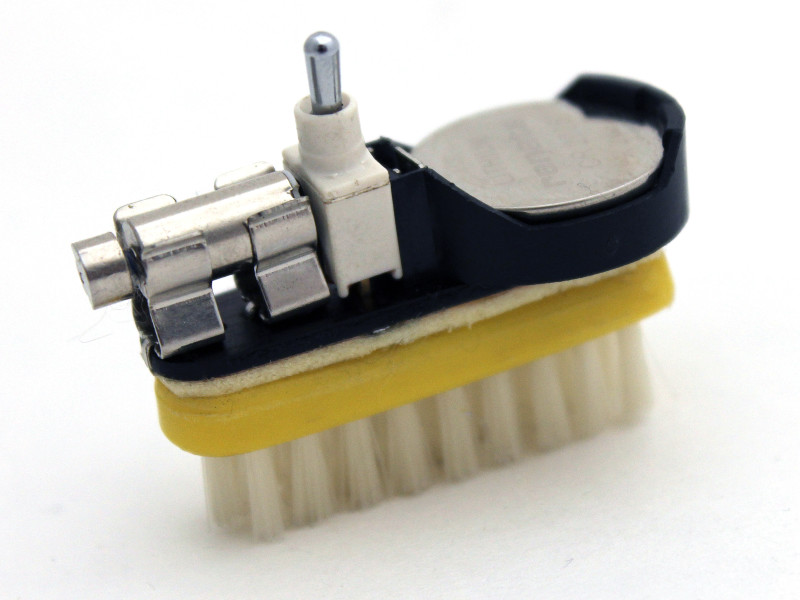
A yellow toothbrush head, with white bristles, that's been cut from the handle. The bristles are on the ground, and there's a layer of foam tape on the back of the head securing a small piece of black phenolic board that matches the shape of the head.  On top of the phenolic board are a small pager motor, mounted in fuse clips, a toggle switch, and a CR2032 coin cell battery holder with a battery inside it.

Plastic toothbrush head, fuse clips, pager motor, toggle switch, copper-clad board, double-stick tape, coin cell and holder.

I made this little robot sometime in mid-2014. The motor case, fuse clips, and most of the underside copper layer are grounded, with small “islands” manually cut clear to carry Vcc. The sides and top of the phenolic board are stained black with Sharpie marker, and the foam tape provides a solid interface with a bit of give to accommodate the underside solder points. The toothbrush belonged to my grandmother; I found it in a travel kit in a piece of very old luggage.

“Drains to Creek,” 2014

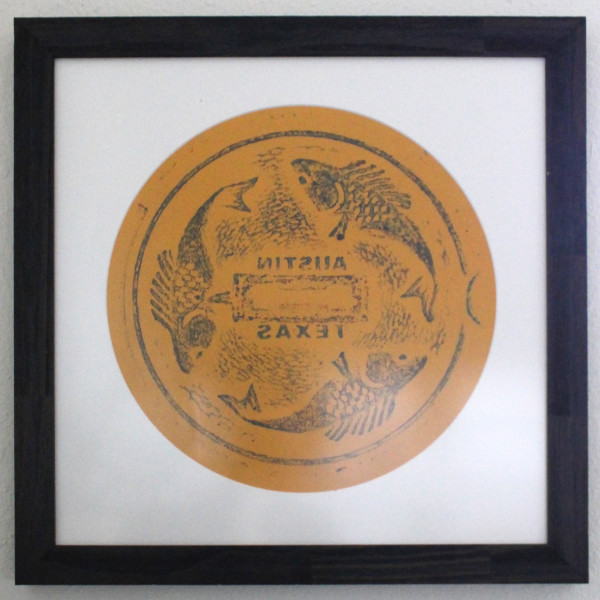
A blue and green rubbing on orange paper, in a circular mat, in a square dark purple frame. The rubbing design features three stylized fish chasing each other around a circle, with the words AUSTIN TEXAS mirror-reversed at the center.

Fadeless bulletin board paper, oil crayon, fixative.

This is a small manhole cover rubbing I took in August 2014 my then-girlfriend Dr. Suzanne Stambaugh at a storm sewer on the corner opposite my old house. It uses a different technique from my earlier rubbing—here the color is applied to the steel first, then the paper laid on and burnished over it. This was Suzanne’s idea. (Thanks, Snoo!) The three-fishes design indicates a sewer that empties into a natural reservoir, rather than a treatment plant. Supposedly, the historic O’Raigan coat of arms sports a similar motif.

Seek Thermal Imager HTC DNA Hack

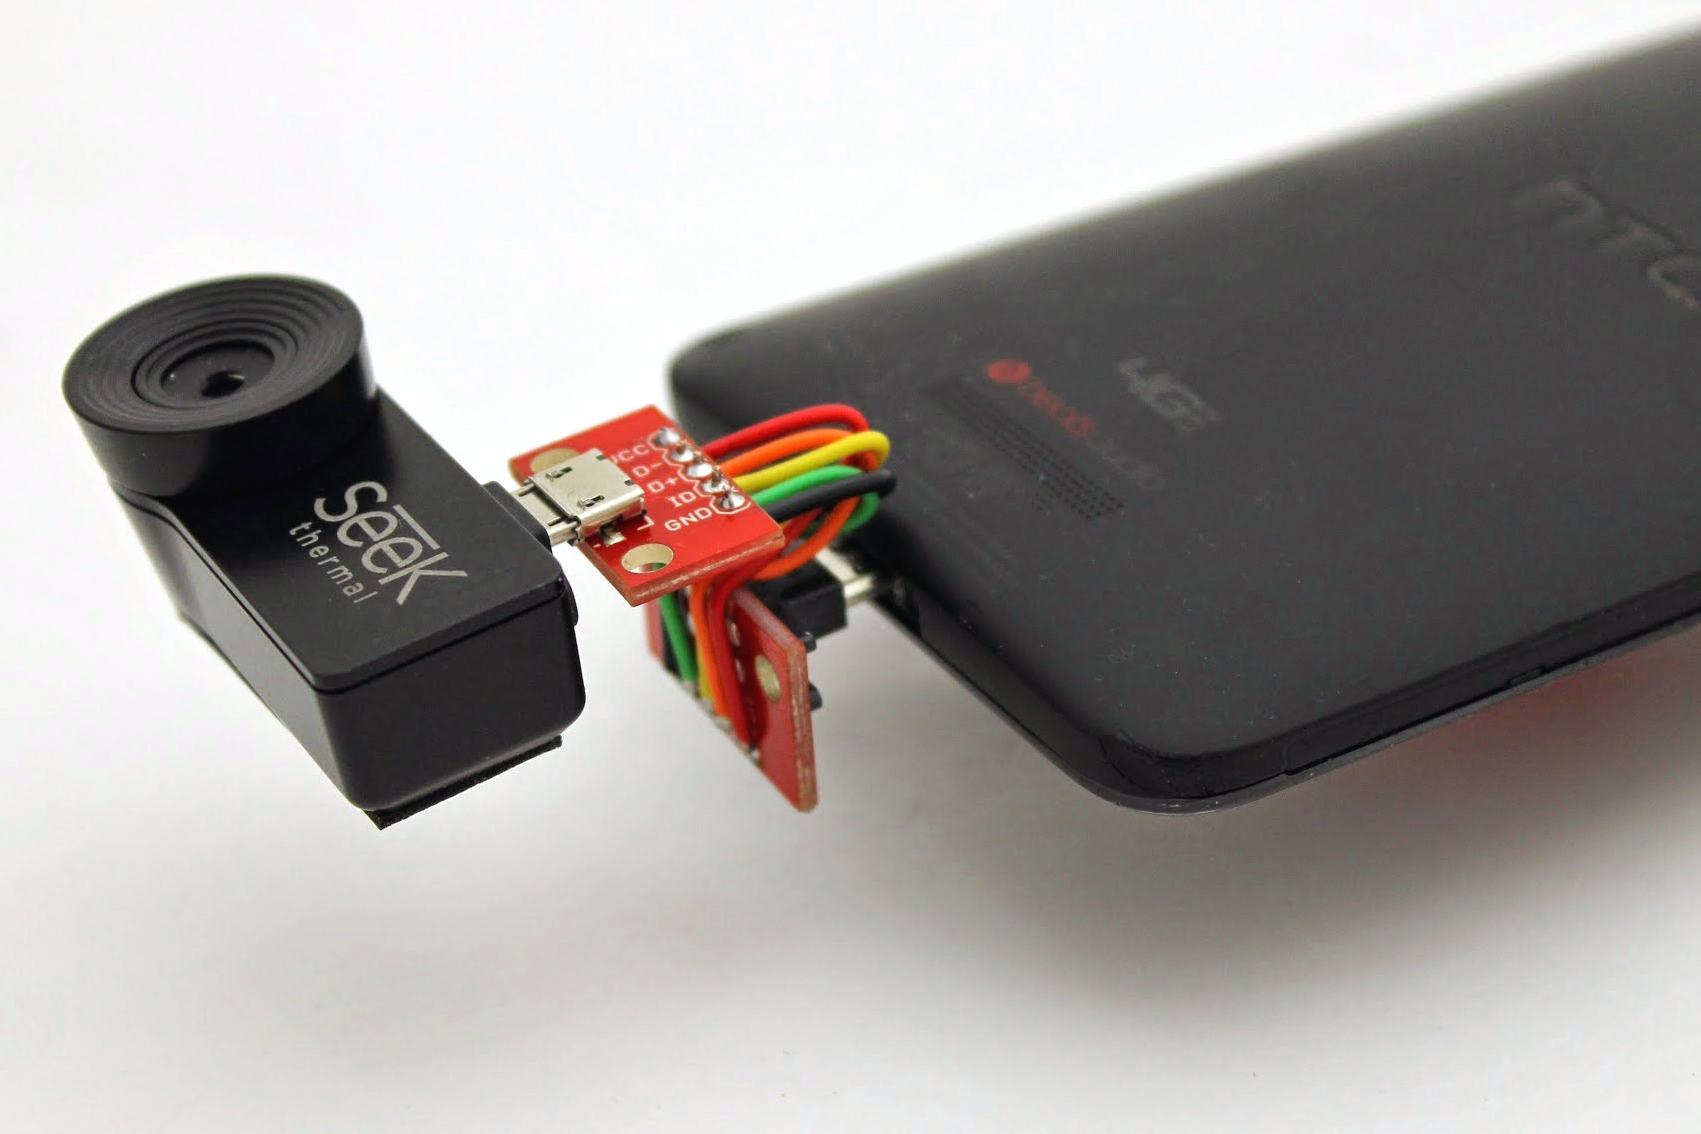
Close shot of bottom rear of HTC DNA smartphone with improvised reversing adapter attached between the phone and a Seek thermal imager add-on.

Possibly the best gift I received in 2014 was this Seek thermal add-on imager for my phone. Unfortunately, the device comes with a non-reversible micro-USB plug attached, and the single jack on my HTC Droid DNA is “upside down,” meaning the imager’s optic ends up facing the same way as the screen.

Otherwise, the thing works like a champ: app was easy to install, works well, plugged in and started up with no problems, etc. The hardware’s also pretty slick, and comes with a ruggedized keychain case so you can carry it around in your pocket. But it’s basically useless with the lens facing the wrong direction.

The Seek website recommends this six-inch male/female micro-USB extension cable for devices affected by this “backwards” problem. I bought one and it didn’t work. Again: Plug the imager directly into the phone port and it works fine; plug it in through a 6-inch USB cable—the one the manufacturer recommends—and it doesn’t. Neither the phone OS nor the imager app shows any sign of detecting the device. This was especially frustrating because the very first review on the Amazon page for this cable is titled “Works fine with the Seek Thermal.”

About this time I discovered, to my chagrin, that micro-USB extension cables come in various flavors depending on whether they are for charging/syncing the phone or allowing it to serve as a USB host (“OTG”). The hackers and engineers reading this will immediately understand my frustration at this idea—it’s an extension cable, for f*ck’s sake: All the contacts at one end should be connected to the corresponding contacts at the other end, with continuous conductors between them. Is that really too much to ask? Omitting certain conductors just serves to fragment the market and create artificial demand for multiple purchases from individual users. Nonetheless, on a lark, I bought the complementary “charging” cable and discovered that, unsurprisingly, it does not work either.

Getting really pissed off now, I hopped over to eBay and bought a US-made 6-inch micro-USB extension cable advertised as “ALL 5 WIRES CONNECTED,” which of course is what “extension cable” should mean in the first place.

Guess what? That cable didn’t work either. There was, however, now at least a glimmer of hope. Using the eBay cable, the phone OS would detect the imager’s presence just as if it were plugged directly into the port. But the imager app, itself, still showed the (now infuriatingly glib) prompt, “Connect camera to enable thermal imaging.”

Shown in the photo is what finally worked. I jumped over to SparkFun and bought matching male and female micro-USB breakout boards, then manually soldered solid-core breadboard jumper wires between the two. I did as neat a job as possible on my little homemade ribbon cable, then put a single twist in it to turn the lens in the right direction.

Now, finally, it works. But the whole experience has left me with an intense distrust of USB cables, and very impatient for the new reversible Type C micro USB connector to arrive.

Gorgeous Antique British Light Switch

Beautiful Antique British Light Switch

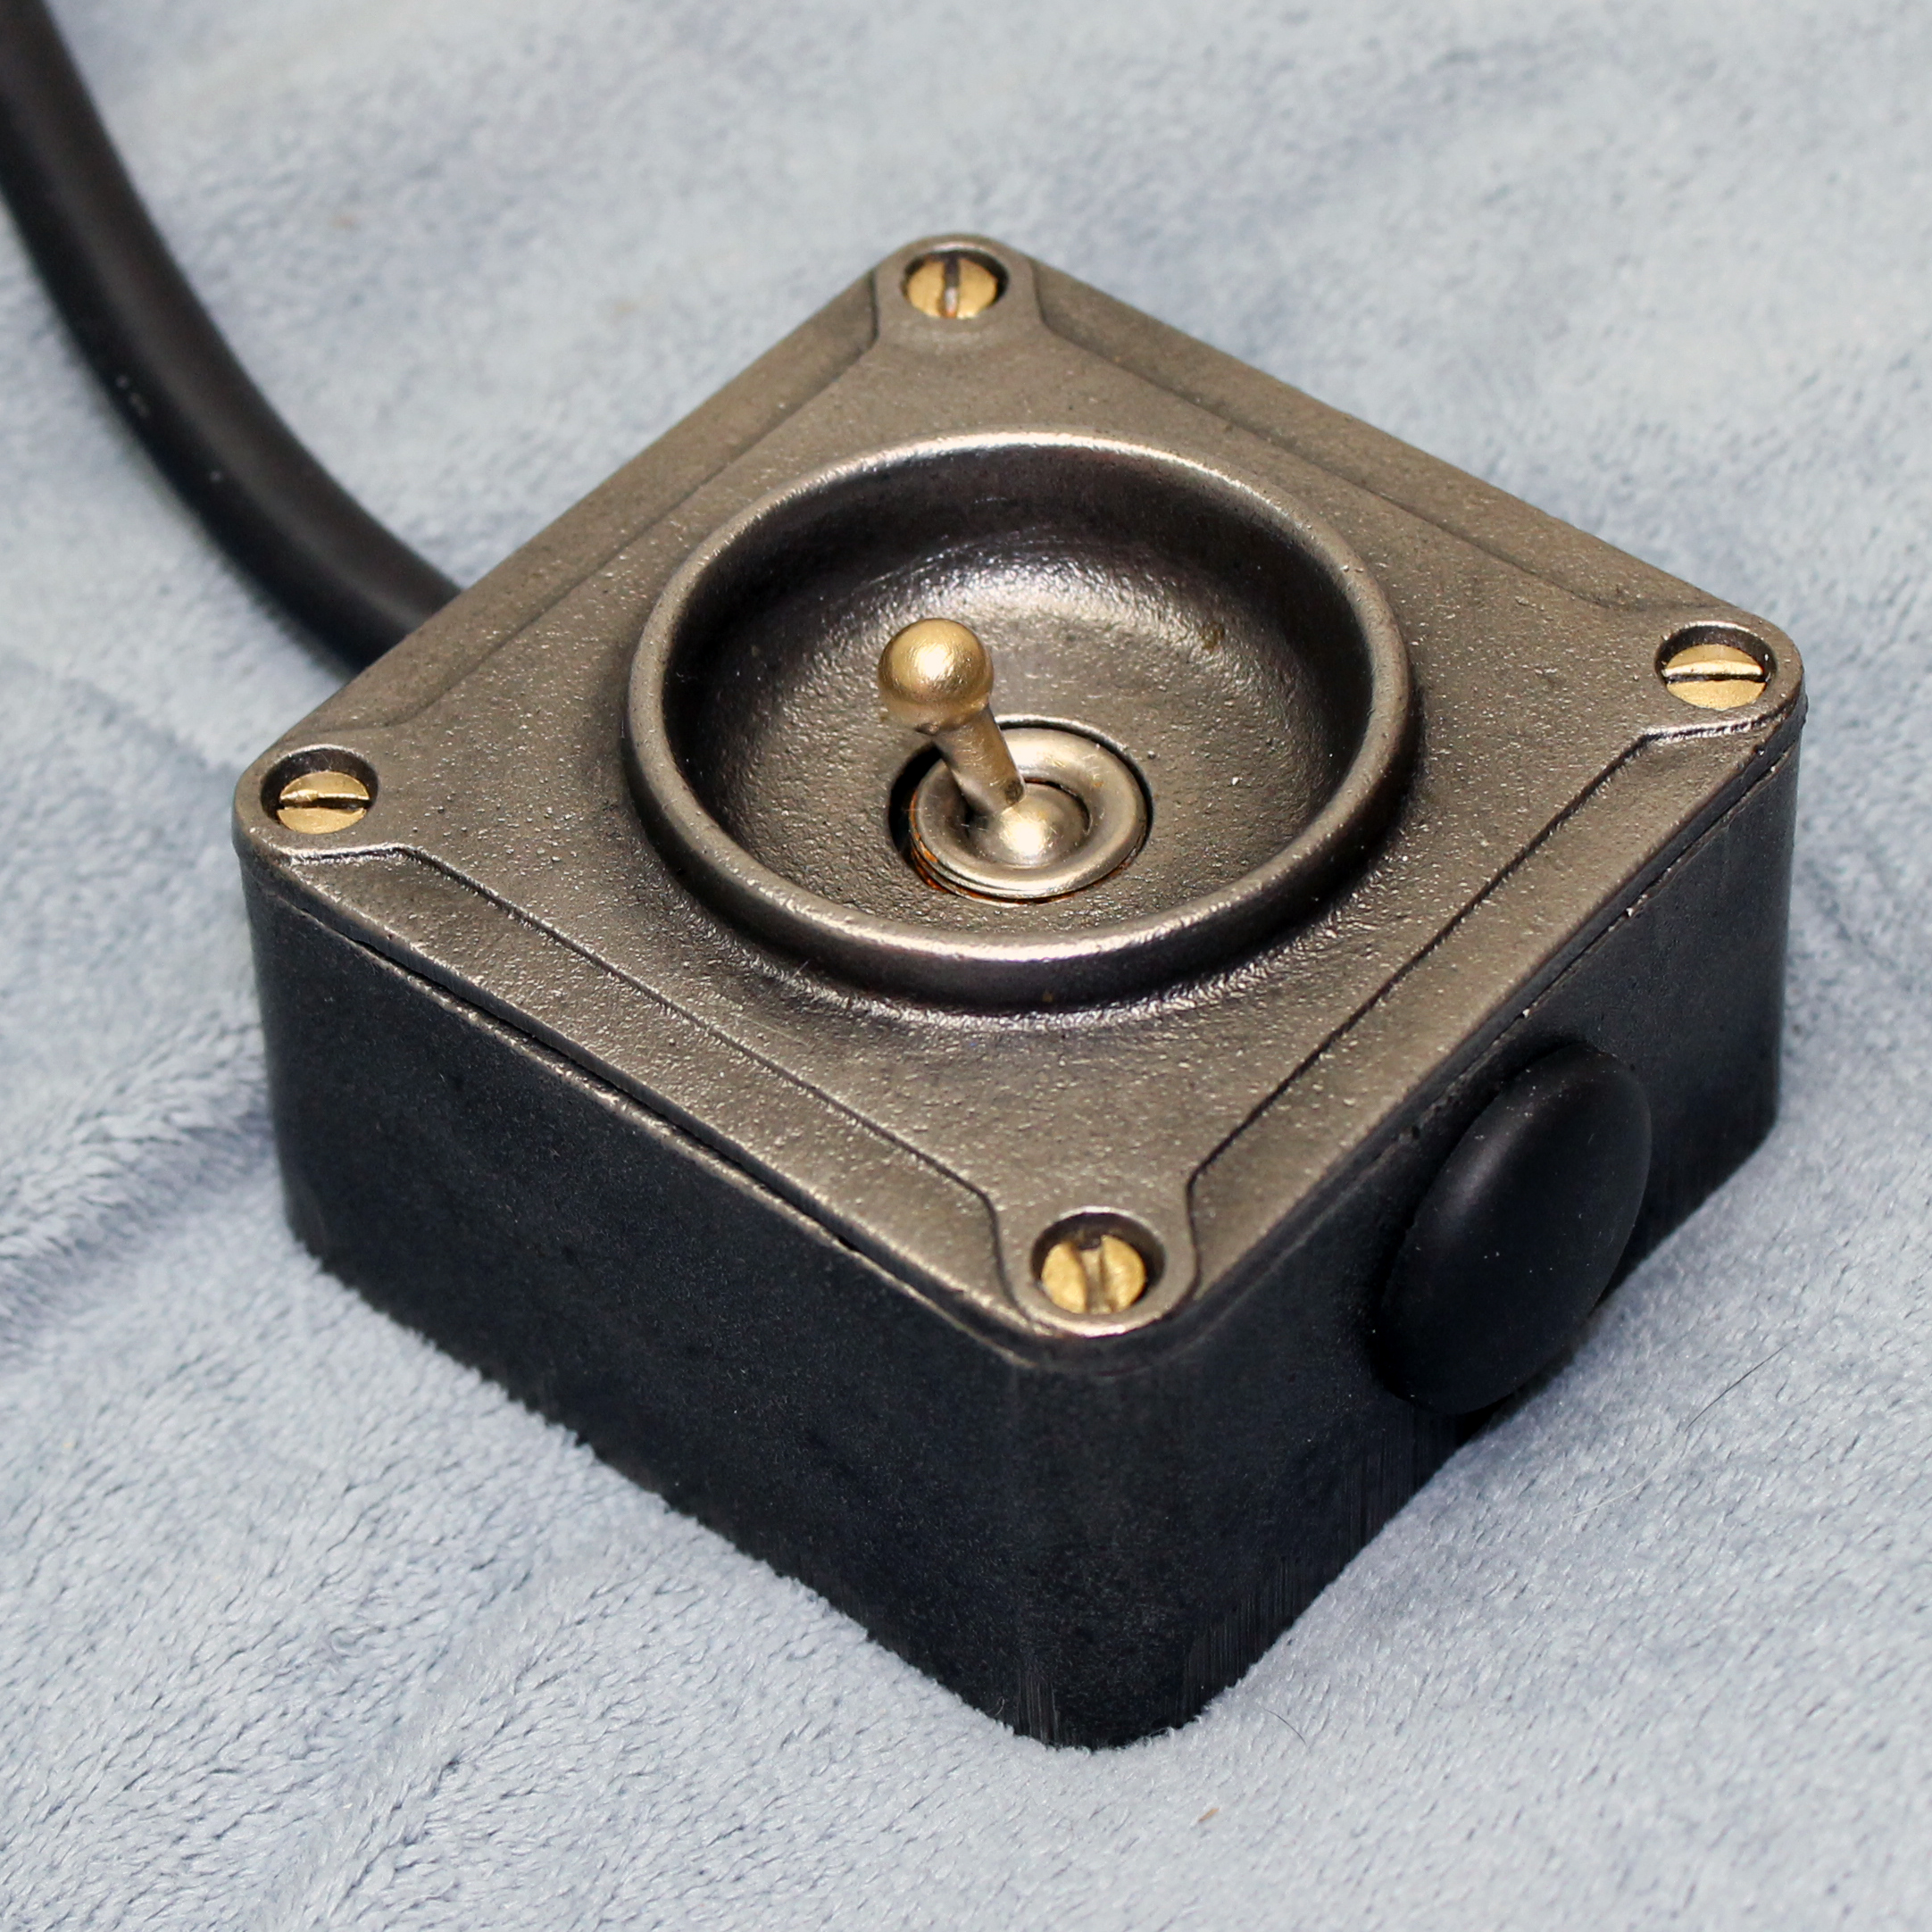
They don’t make ’em like they used to. This is a Crabtree model A15051 single-gang AC light switch, with cast iron body, that I recently scored on eBay. It was likely manufactured in the 30s, 40s, or 50s, and restored by the eBay seller. I wired it as a remote switch for my photo soft box. Thing’s built like a tank, beautiful to look at, feels great to the touch, and operates with a satisfying CLACK.

R14 Light Bulb Salt-and-Pepper Shakers

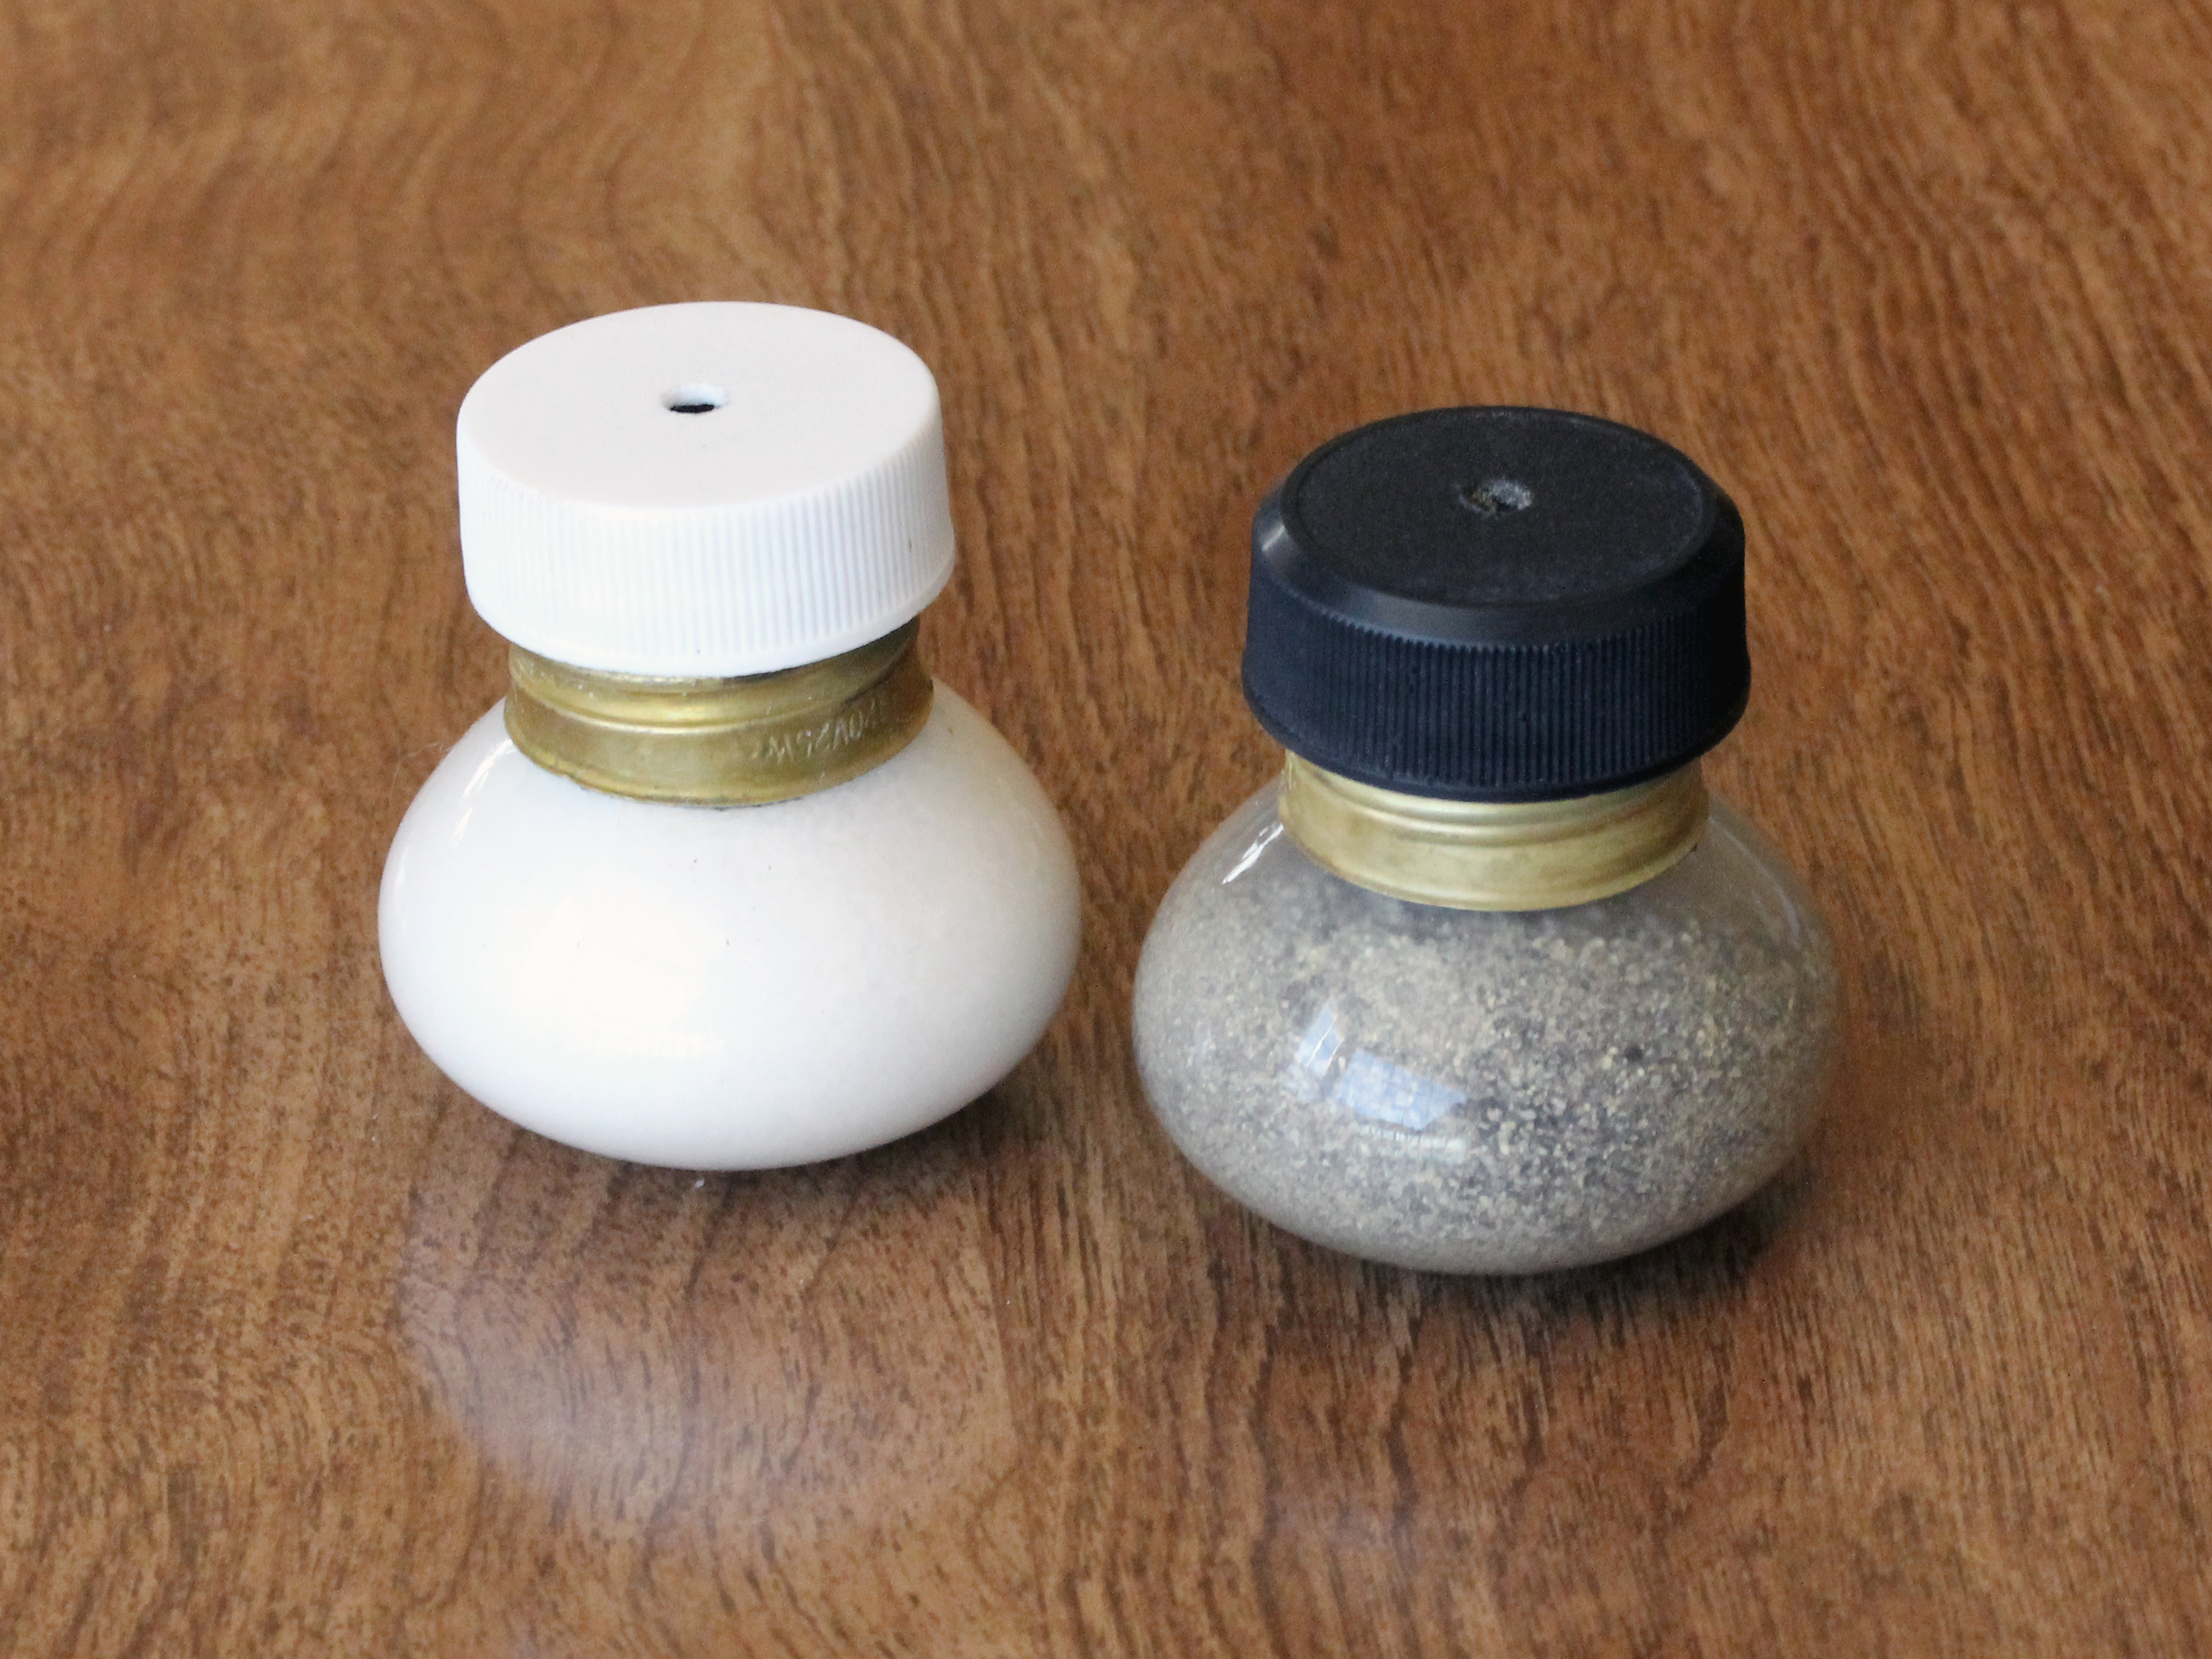
Salt-and-pepper shaker set made from small "floodlight" style light bulbs and two soda bottle caps.

The discovery that standard Edison bulb bases screw perfectly into 16 oz. PET bottle caps was a profound moment for me. Fun fact: Standard female garden hose (FGH) thread will also fit a light bulb base (and, I suppose, by inference, a 16 oz. PET bottle).

I found these mini floodlight/reflector bulbs burned out in an old china cabinet. I reclaimed them by hollowing out the bulbs using the familiar method, etching off the metal coating inside with extra-strength white vinegar, and fitting them with white (salt) and black (pepper) 16 oz. screw-top pop bottle caps with holes drilled in the center. Unlike a regular pear-shaped light bulb, this mini-floodlight type will stand upright on its own without help. I’ve done this before, but never with these cute little R14 bulbs.