I’ve been on a “they don’t make ’em like they used to” kick lately, replacing a bunch of my new, flimsy, designed-for-disposal household appliances with old, battle-tested, designed-for-repair type stuff scored on eBay. Whether it’s the Cord-o-Matic retractable clothesline I snagged for my mom, the 1984-vintage Panasonic Auto-Stop electric pencil sharpener I bought for myself, or the cast aluminum Porter-Cable Model 136 I bought to replace my dad’s cheap Harbor Freight belt sander (which literally ground itself apart), I almost inevitably find that buying a used product with a proven track record gives a better overall experience than a new product that, as a friend on Facebook recently put it, “has had all the cost taken out.” Older stuff is usually easier to open up, refurbish, and repair, too, and it always has better stories.
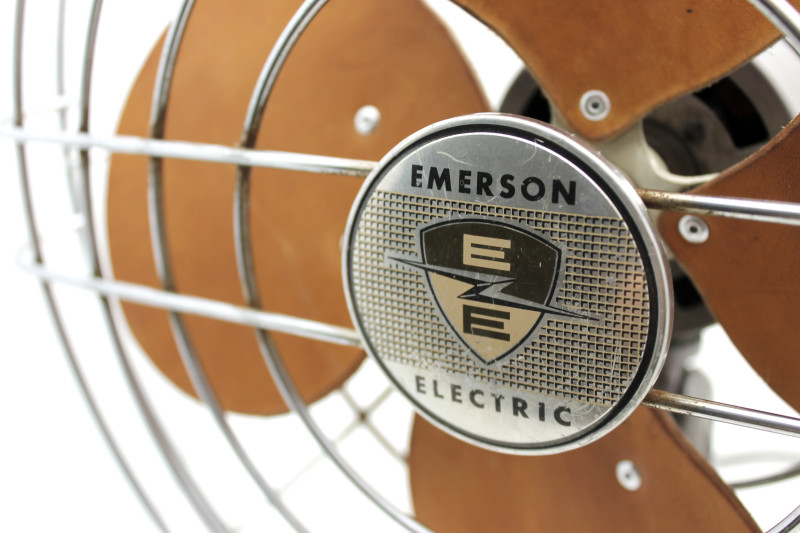
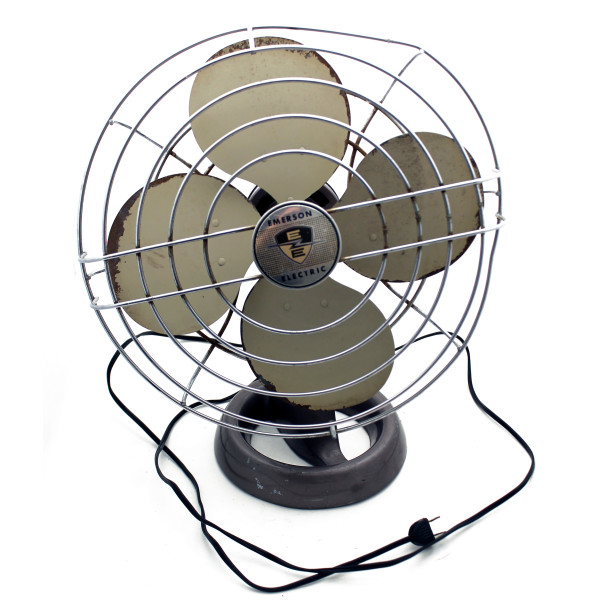
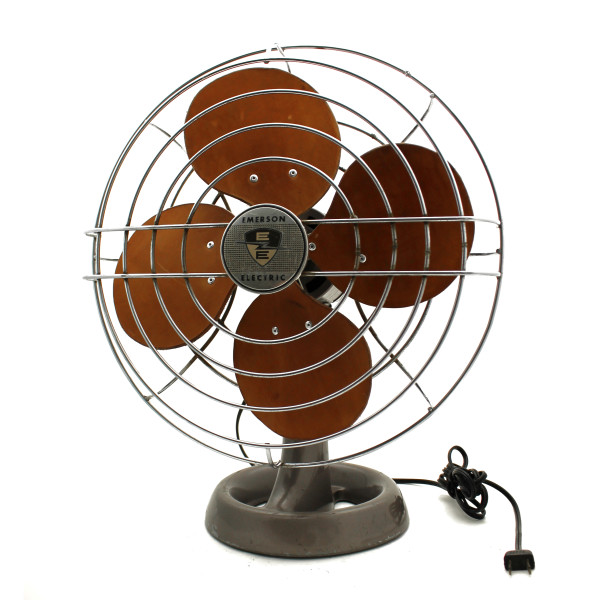
So when my cheap plastic box fan recently self-destructed, I “retrograded” to this lovely chunk of metal—a model 94646-E “Northwind” oscillating electric fan by Emerson Electric, which appears to date from around 1955. You can see that it’s pretty beat-up, which is fine; I wasn’t looking for a carefully-preserved collector’s item, just something that worked and would be easy and fun to refurbish. I paid $45 plus shipping through eBay.
When the package arrived a couple weeks later, I cut it open and looked the fan over. There was some cosmetic damage—the cage was bent out of shape and the paint was peeling here and there—but when I plugged the thing in, it ran like a cheetah. The range of the oscillating motion was weirdly offset to one side, but it didn’t take long to figure out that somebody had reassembled it with the motor hub backwards on the base, and that flipping it around would center everything up again. Piece of cake.
Ten Minutes Later…
…I had cut myself, on the spinning blades, so badly that I thought I might need stitches. If I’d had more presence of mind I would’ve snapped a picture of the injury, but it’s amazing how preoccupied you can get when your body suddenly has a new orifice, oozing blood in time to your rapidly-escalating heartbeat. Once the cursing stopped and the bleeding was under control, I started laughing at myself. Apparently, in some cases, there are pretty good reasons why we don’t make ’em like we used to. When I told my mom, she smiled and said, “It’s amazing anyone from my generation grew to adulthood.” Which, I think, was her nice way of saying, When I was your age, we knew better than to stick our fingers into a spinning fan.
I wore an ugly mess of band-aids on the tip of my thumb for the next 10 days, and it was almost a month before the wound fully healed. I’m lucky things didn’t turn out any worse, since the fan had been stored who-knows-where, who-knows-how-long before coming to me, the edges of the blades were visibly rusty, and it had been waaaaaaay too long since my last tetanus shot.
What now?
So I sat, nursing my aching thumb, and wondering what to do with the fan. Would I remember cutting myself on the blade? Definitely. Was it nonetheless possible that I would eventually do it again? Also definitely. Given that it had taken less than ten minutes the first time, I gave it about even odds. Besides which, I was not the only one who might be exposed to this hazard. There was my girlfriend to think about. My nieces and nephews. My cat.
I had seen recently-manufactured fans with blades made of semi-rigid foam, silicone, or other soft polymer intended for safe use around a child, but I just couldn’t stomach slapping plastic blades on such a beautiful slab of post-war American industrial design. I’d sooner sell it to somebody else and go back to a modern appliance. But was there a more authentic, tasteful material that would also be softer and safer?
Of Course: Leather.
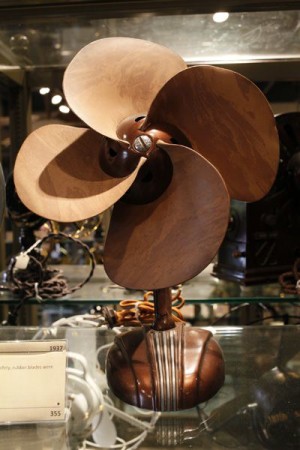 I had worked with vegetable-tanned belt and strap leather before, and knew I could buy it with weight and stiffness suitable for fan blades. What’s more, a bit of Googling revealed that this had been done before. To right, for instance, is a beautiful Art Deco-styled 1950 Robinson-Myer desk fan manufactured with leather blades, for safety, that was pictured in the July 2011 issue of Indianapolis magazine.
I started sourcing leather on the Tandy Leather Factory website, and though they taught me enough about how leather is cured, graded, and sized to figure out what I needed, they did not sell that material in quantities that were reasonable for this use. So it was back to eBay, which eventually lead me to Distant Drums, who sold me four pieces of their 10-11 oz. veg-tan tooling leather, each of which was just about the right size for a single blade. That set me back another $25, including shipping—the price of my “retrograde” was getting worse, but then the story was getting better, and that’s usually a trade I’m willing to make.
The Deets
First, you’ll wanna take off the blade assembly. In my case, this involved loosening a set screw that held the fan hub to the motor shaft, removing the two bolts that held the wire cage to the housing, separating the blades and the cage (together) from the rest of the fan, and then holding my mouth just right to rotate the blade assembly free of the cage. Second, you’ll need to remove the old blades. Mine were riveted to the hub, and were easily removed by drilling, from the back side, with a 3/16″ diameter bit. Once you’ve got the blades free from the hub, proceed as follows:
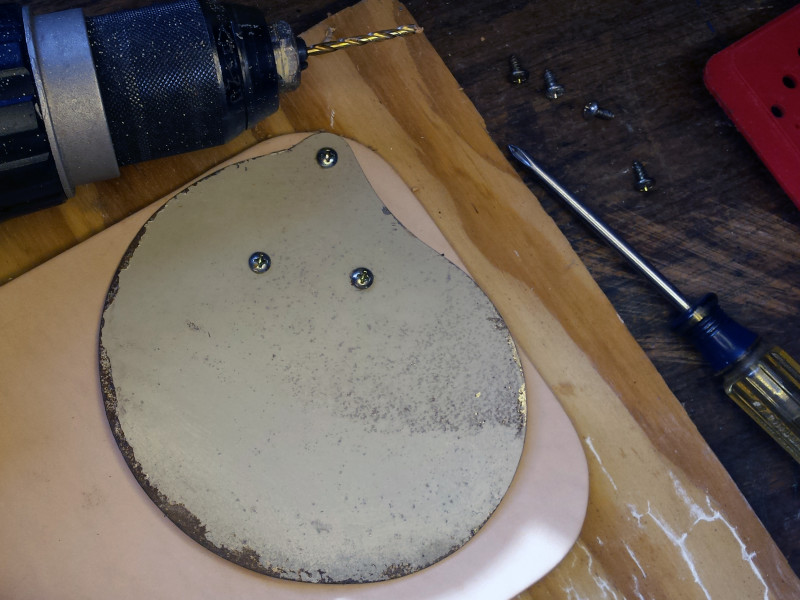
1. Put a piece of scrap wood down on your work surface, and then put your leather stock on top of that. Top the stack off with the template fan blade, then drill pilot holes through the blade mounting holes, through the leather, and into the wood. Secure the blade and leather to the wood with three small wood screws.
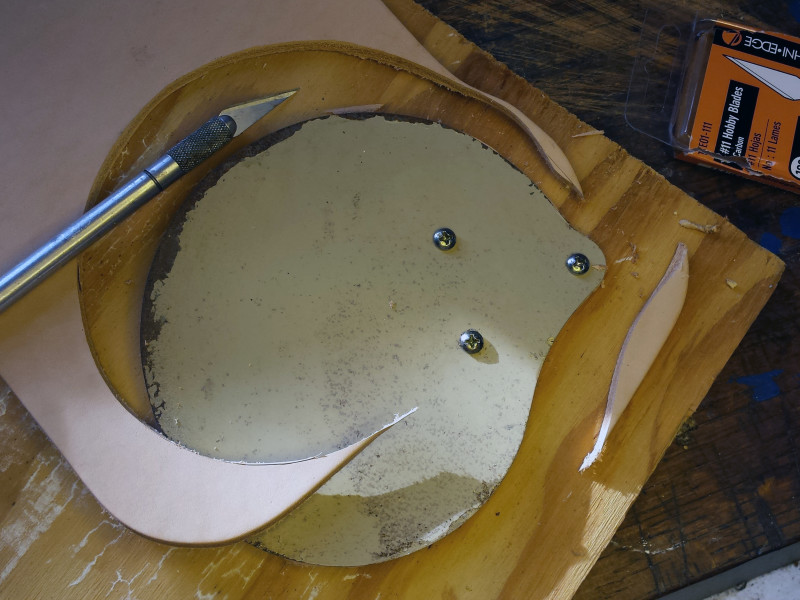
2. Trace around the perimeter of the fan blade with a sharp hobby knife, cutting through the leather as you go. It will likely take a couple of passes.
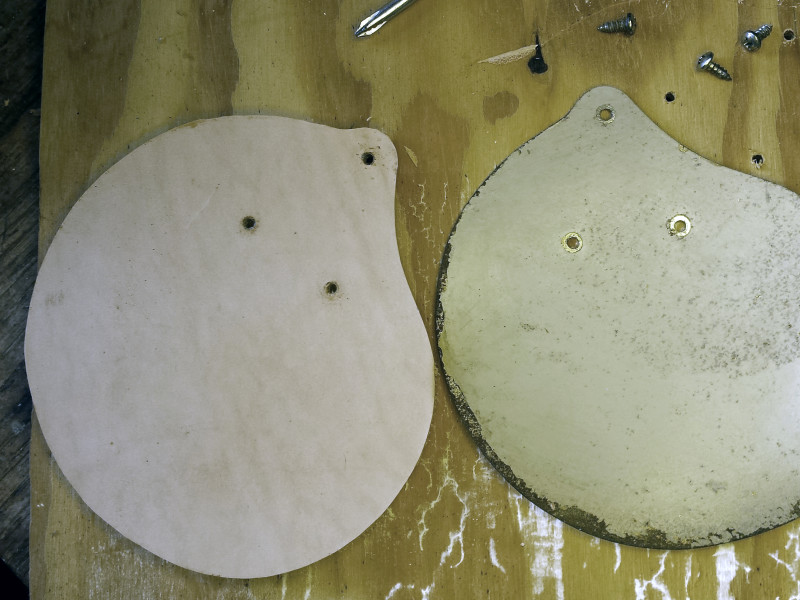
3. Remove the screws and separate the leather.
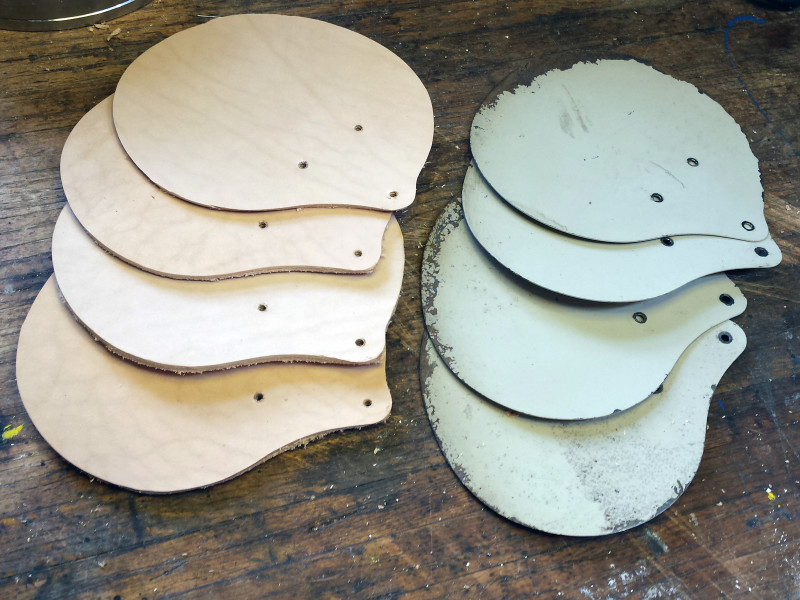
4. Repeat steps 1 – 3 three more times to cut four identical leather blades. NOTE: Be sure to identify two pairs of blades that are balanced to within 0.5g before proceeding (see below).
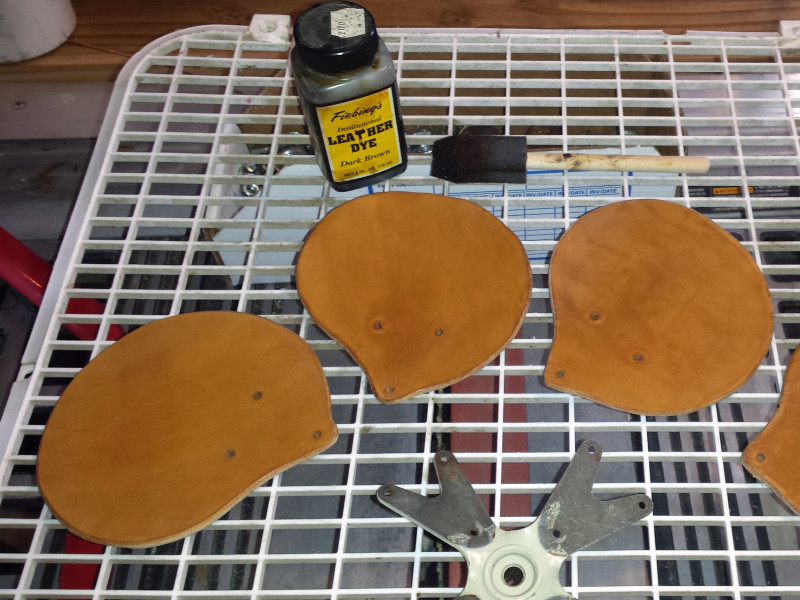
5. Apply leather dye to the front and back of the blades, per the dye directions, until the color pleases your eye. Let the dye dry thoroughly.
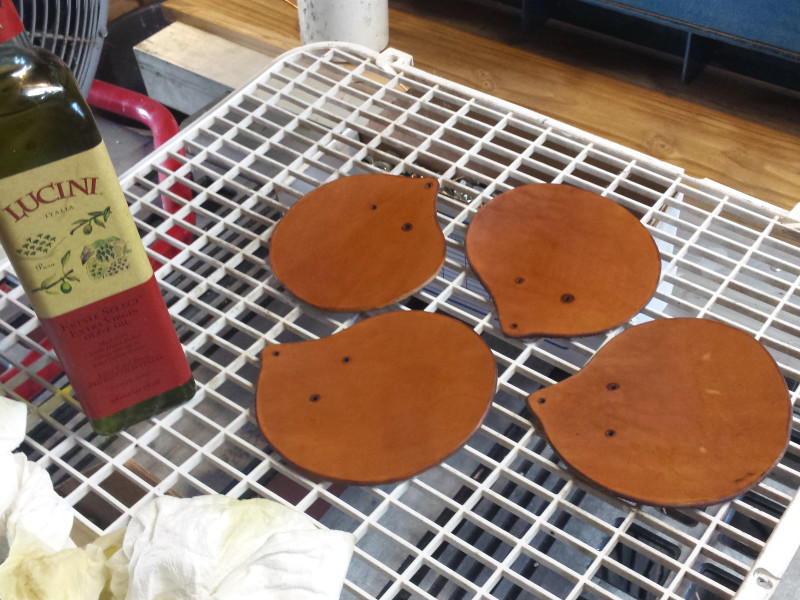
6. Rub extra virgin olive oil into the front and back of each blade to act as a finish and preservative. Allow excess oil to evaporate before proceeding.
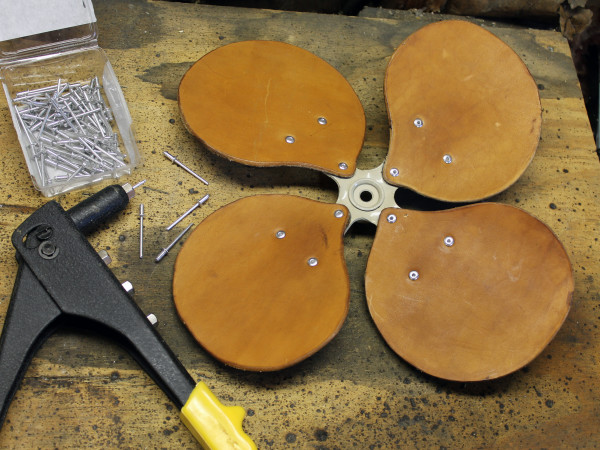
7. Attach the finished blades to the hub using pop rivets and a pop rivet tool. To avoid tearout, the wide flange of the rivet should be against the leather, not the metal of the hub. Be sure opposing blades are weight-matched to within 0.5g before riveting.
Make Sure to Balance the Blades
My first assumption was that the leather was pretty homogeneous and that, if I cut four identical blades from it, they would each weigh about the same. Not true. The first time I put the hub and leather blades together, the fan wobbled horribly, and I had to drill out the pop rivets and break out my postage scale to weigh the blades, at which point I discovered that one of them weighed 46 grams, while the others all weighed about 40. I used a micro-plane kitchen grater to remove leather from the flesh side of the heavy blade, and then had to re-apply stain to replace the color I’d scraped off. If you try this project, learn from my mistake: weigh and balance the blades before applying any finish.


 Chemical & Engineering News is the American Chemical Society’s print organ, which is mailed to each of its 160,000-plus members weekly. Their back-page human interest column is called Newscripts. The most recent issue, dated November 21, 2011,