 Last Spring I got it in my head to make a concrete bowl. Mom had a book—Concrete Crafts by Alan Wycheck, specifically—with a project for a bowl made by casting concrete with colored glass fill between two cheap stainless steel mixing bowls, and we decided to try it.
I had a bunch of blue and green glass bottles on-hand, and broke these up by submerging them in a big galvanized washtub and bashing them with a fence-post driver. The water works nicely to prevent flying shards. Once the glass was pounded down to about US quarter-size, on average, we dumped the washtub out onto an old bedsheet on the lawn, in the sun, and gathered up sheet and glass together when everything was dry. We didn’t bother to remove the labels, first, which proved to be a mistake, in the long run, because we were picking bits of paper out of the glass for most of the rest of the project. It was an annoyance, not a critical error, but in hindsight I’d recommend spending the time to take the labels off, first.
We mixed up the concrete per Wycheck’s recipe (2:1:1 glass:sand:Portland cement, by volume, plus water to “taste”), spritzed the inside of the large bowl and the outside of the small bowl with generic “mold release” from Hobby Lobby, and dolloped in a generous portion of the wet mixture before inserting the smaller bowl and compressing until concrete oozed out around the lip. We set the stacked bowls in a corner of the porch, covered them with a soaking-wet towel, covered that with a plastic garbage bag to hold in the moisture, and weighted everything down with a pair of cobblestones. Then we left it for week. (Concrete gets harder the longer it stays wet during curing.)
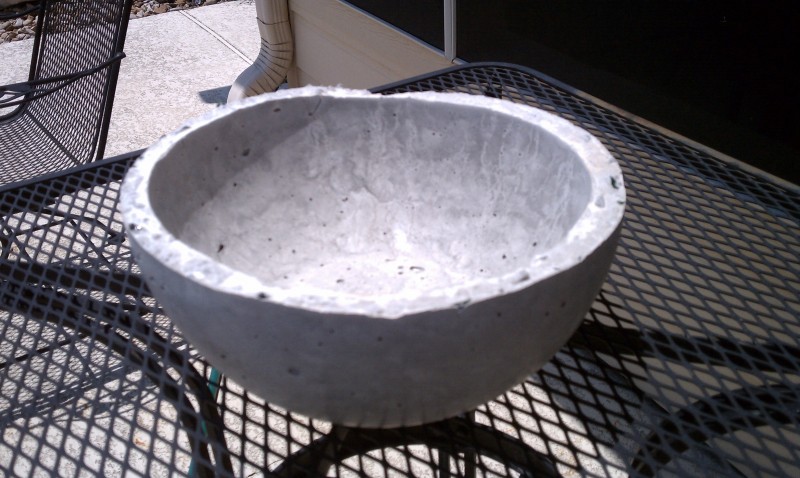
The following weekend, there were a few tense moments when it seemed like the mold would be impossible to open without destroying its contents. But repeatedly dropping the stack on a towel spread over a cement patio floor, from a height of a few inches, eventually worked both inner and outer molds loose and a cleanly-molded concrete bowl popped out.
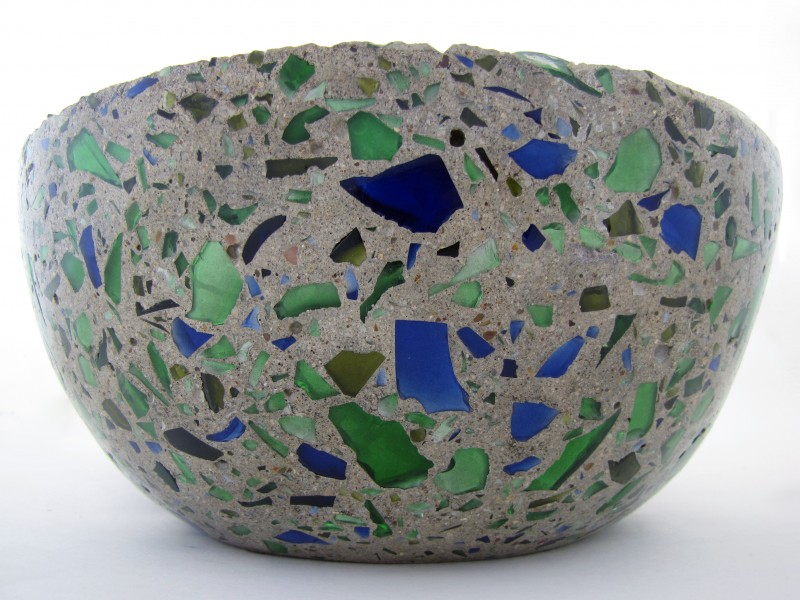
 The instructions in Wycheck’s book, at this point, advise the reader to “sand or grind the surface to expose the glass.” In practice, in my experience, those nine words entail about 95% of the time, and 99% of the physical effort, expended in the project. I spent about 20 hours, all told, over the course of several weeks, working over the outside of the bowl, using an auto-body grinder with a six-inch-diameter flexible rubber pad and a set of diamond-impregnated abrasive pads, to achieve the results shown here. I turned the bowl upside down and fit it over an old barstool so I could work on it standing up.
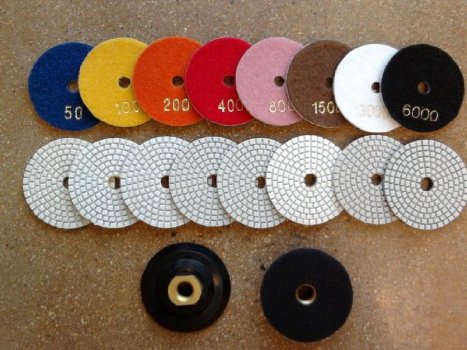
These diamond polishing pads were not available locally, and had to be ordered online. They came in a set of eight grit sizes ranging from 50 up to 6000 grits, attaching by Velcro to a hard rubber pad threaded for a standard grinder arbor. That hard pad very quickly overheated, the first time I tried to use it, causing the adhesive holding the Velcro on to melt and the Velcro layer to come loose from the pad. When I complained about this to the seller, fortunately, their response was really outstanding: They sent me a new, soft rubber pad, for free, explained how I could fix the broken one with rubber cement. I had no problems with the soft replacement pad throughout the remainder of the project and, indeed, the hard one was good as new after the recommended repair.
With my equipment problems resolved, I set to with the grinder. I spent about 10 hours at the largest (50) grit size, just grinding away the so-called “cream” to expose the glass, and then worked down to smaller and smaller grits, spending about two hours each on 100, 200, 400, and 800 grits. There was a really striking improvement in the step from 400 to 800, and for a day or two I fully intended to polish the whole bowl all the way out to 6000 grit. But then I lost patience and just applied a polymer sealant, specifically Arrow-Magnolia International’s Glo-crete (some of which was leftover from my condo renovation), inside and out. This provided a nice, shiny, “wet-look” gloss.
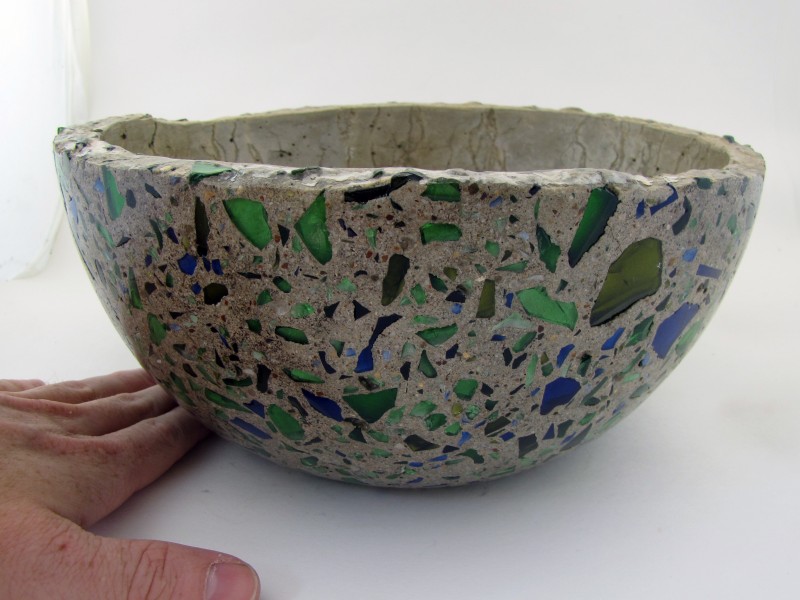
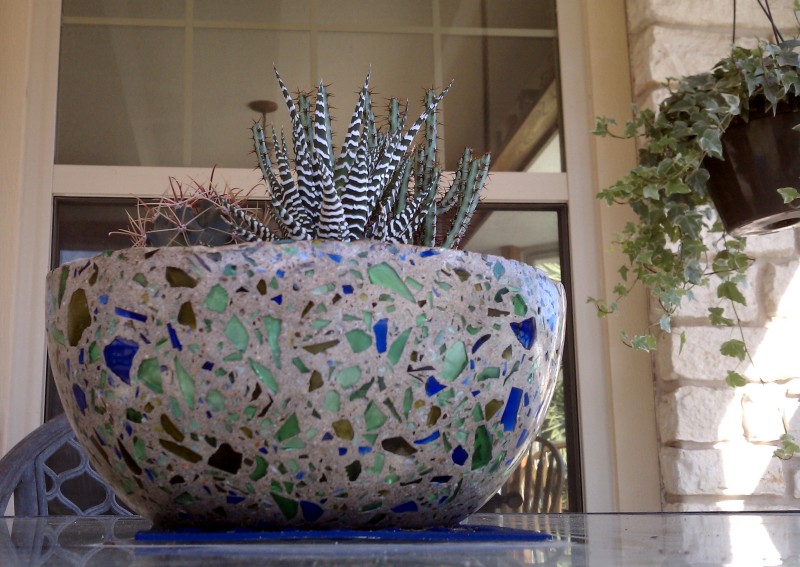
I’m quite pleased with the finished product, which I gave to Mom as a gift. But damn. It was much, much, much more work than I’d planned on, and I feel like Wycheck’s book should’ve done a better job of preparing me for the time commitment, and of providing guidance about the specialized equipment that would be needed to get it done.


 Last Spring I got it in my head to make a concrete bowl. Mom had a book—Concrete Crafts by Alan Wycheck, specifically—with a project for a bowl made by casting concrete with colored glass fill between two cheap stainless steel mixing bowls, and we decided to try it.
 The instructions in Wycheck’s book, at this point, advise the reader to “sand or grind the surface to expose the glass.” In practice, in my experience, those nine words entail about 95% of the time, and 99% of the physical effort, expended in the project. I spent about 20 hours, all told, over the course of several weeks, working over the outside of the bowl, using an auto-body grinder with a six-inch-diameter flexible rubber pad and a set of diamond-impregnated abrasive pads, to achieve the results shown here. I turned the bowl upside down and fit it over an old barstool so I could work on it standing up.

